
 This is Janelle Brian, and I am the owner & operator of Images Custom Framing in Littleton, CO. I am excited to share with you all some basic things you should know about framing your photography! Before we get started though, let me tell you a little more about myself…
I have been running Images Custom Framing for over 30 years now!
I consider myself very blessed to be able to make a living doing what I love from home. I’ve worked in 4 different gallery/frame shops, and have had the privilege of working with some of the best people in the business! I have loved working with art on the retail side, but nothing can beat working from home. I get to set my own hours, and make time for travel. (CHECK OUT MY IMAGES WEBSITE HERE)

I also have the website that I design and maintain called “Road Trips and Tiny Trailers”, which is an online road trip planner for those traveling in a tiny trailer. My love for travel, art & photography is a perfect package for me, and I love turning that package into a career! (CHECK OUT MY ‘ROADTRIPS’ WEBSITE HERE) 

My husband, Eddie and I are travel addicts from right here in Colorado. We now find ourselves in the phase of life called ’empty-nesters’, and we are making the most of it! We stay busy traveling in our tiny trailer, writing books, learning more about art & history, and taking photos!
We’ve recently purchased a couple of new cameras. For Eddie, a Sony full-framed mirrorless was simply an upgrade from the one he had, but for me it was a head-first dive into the deep end of the lake with no knowledge of how to swim! Although I’d been fairly content with my top-of-the-line point & shoot, Eddie gave me no option. After all, we were heading to Hawaii for the first time, and my little Lumix just wasn’t going to cut it. I didn’t want to be
  ‘that gal’, but I guess I was ready to move up to the next level of photography for my websites. And again, Eddie gave me no choice.
Between us, Eddie & I now have 3 camera bodies (mine is also a Sony full-framed mirrorless) and 8 lenses. He bought me my Sony body with the initial kit lens, but I’ve been on my own ever since. It is SO easy now to acquire G.A.S. (Gadget Acquisition Syndrome), and yep! – we’ve got it. You probably have it too. All our lenses are interchangeable, but I’ve learned that neither Eddie or I really like to share.
I’ve learned a great deal since snapping that first photo in the AUTO setting, but what I have yet to learn is absolutely never ending. (For some Key Basics of Photography for the beginner, click HERE). I suppose that’s true of most all photographers, but unlike me, many of you are probably ready to start framing and even selling your work if you haven’t already!
 But before we tackle the nuts & bolts of framing your photos, I should mention that there are also other applications that you can do with your photos.
For instance, you can create online photo albums with Shutterfly, Picaboo or Snapfish. These photo books are a great way to pass down your family memories without worrying about the changes in technology that can create challenges with being able to view your photos. (This is a service that I provide, so if you need someone to create an album for you, you can contact me HERE!)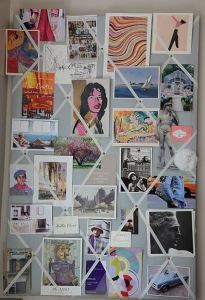
You can create collages that are not actually framed, but give you a chance to show off your latest photos. The ideas here are endless, but usually need to be a temporary display.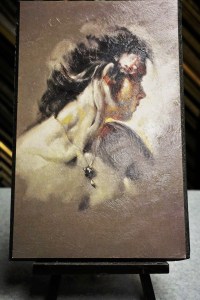
You can also mount a photo directly on foam board for an inexpensive way to display your work, and if you want to get super fancy, you can even paint it with acrylic gel (we call that a ‘master brush-stroke’) to create an oil-on-canvas effect.
If you are selling your work, you might consider offering some different standard sizes of your work, shrink-wrapped with mats.
Even if you are not a photographer, an artist of any kind can benefit from the information below!
If you are ready to protect your art, or create a ready-to-display piece, then it’s time to think FRAMING…so Let’s dive in!
**********************************************************
OK! For basic matting and framing, we’ll start from the back and work forward through 4 steps.
For Step #1, let’s talk about BACKINGS!
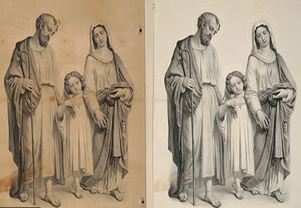
example of paper damaged by lignin in cardboard
To begin, let’s talk about the thing you should NEVER back your photos with: Cardboard. Cardboard (or any material made from non-acid free paper) is made from trees which contain an organic plant polymer called Lignin. Lignin supports tissues and cells in wood, but will discolor your art. It will create a sepia tone to the paper, and can even come through your photo leaving brown, stained spots on your work.
Now, let’s talk about what TO use:
There are actually a number of different types of backing that are used in framing, but we’ll deal just with the main one. Namely, FOAM CORE or FOAM BOARD (which are the same thing).

Foam Board comes in 2 main sizes: 32”x 40” and 40”x 60”. The size you select depends on the size of your art. (You can cut four 16×20 pieces out of a 32″x40″ sheet of FB).
Foam Board also comes in 2 main thicknesses: 1/8” and 3/16”. The depth you choose depends on how deep your frame is. I use 1/8” for about 80% of the art projects I frame. (I’ll choose the thicker option when I need more strength for the project, or when it’s in a deep or shadowbox frame.)
Lastly, Foam Board comes in 2 different choices in quality: Regular and Acid Free:
- Regular Foam Board is made of polystyrene foam covered on both sides with clay-coated liners. It is considered ‘acid-light’ and is safe for most projects, including photo paper. This backing comes in white or black.
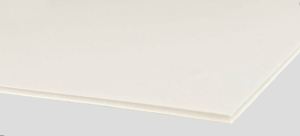
- Acid-Free Foam Board is made of a chemically inert foam covered on both sides with pH neutral acid-free liners. This Foam Board is considered to be ‘Conservation’ or ‘Museum’ quality, and is more expensive. This is what I choose when working with original art, limited edition prints or anything that is irreplaceable. This backing is cream colored.
Regular Foam Board is fine to use with dry-mounting (which uses heat), or vacuum-mounting (which uses a spray adhesive). Both Dry and Vacuum mounting are not used for valuable artwork, so you would not choose acid-free Foam Board to permanently mount a project.
Now that you’ve placed Foam Board on the back of your photo, let’s move on to Step #2: MATTING!
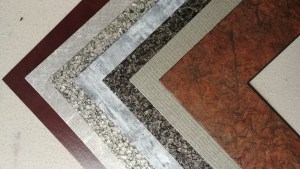
Using matting in your framing project is optional, but provides several benefits. First, it keeps the glass from touching the photo (thus avoiding damage to the photo), and prevents those ‘oily’ spots you can get when a photo sticks to the glass. Second, mats can add appeal to your photo by: drawing the viewer’s eye to the subject, popping out certain colors, and generally giving ‘space’ around your photo. I generally choose two mats, but there are times when either one or three mats is appropriate. Mats also give you the option to shrink-wrap unframed photos that you would like to sell. There are quality differences with mat board, though, and you need to understand those differences before you make your choice. For this blog, we will discuss the 3 main types of Mat Board available:

Paper Mat Board damaged by lignin
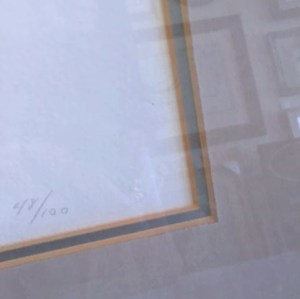
Discolored bevels due to lignin damage
The First option is: Regular Paper Mats. Paper mats come in a wide variety of colors and are your least expensive choice. But like cardboard, they are paper made from trees which contain that plant polymer called lignin that we talked about when we discussed cardboard. These mats will eventually fade, and because the inside edge of a mat is cut at a 45 degree angle, there is a bevel that you see, and it will turn brown. Lignin can also leave brown spots on the mat, but that takes some time. Regular Paper Mats can also leave a brown or discolored stain where they touch your art, which is called ‘foxing’. Paper mats are also prone to fading, especially under regular glass. They are, however a good option to protect and display your photos temporarily until they are properly framed.
The Second option is: White Core Mats. White Cores are also paper mats with all the problems of lignin, but the cores of these mats are made with chemically purified wood pulp enhanced with optical brighteners. The result is a nice bright white bevel which takes much longer to eventually discolor. These mats are only slightly more expensive than regular paper mats, but are more limited with color options. These, too, are great for temporary circumstances.
Lastly, the best option is: Acid-free or Rag Mats. Acid-free or Rag mats are made with 100% cotton, and are my go-to for any art that is worth the cost of framing. These mats keep their color (especially is used with conservation glass), maintain their nice white bevels, and won’t damage your art. They are a little more expensive, but hey!…If your photo worth the cost of framing, it’s worth doing right!
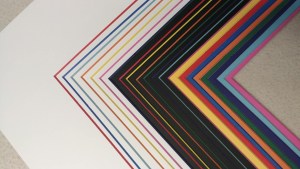
Matting has many more options that your framer can show you. Choices include: thicker cored, metallic, colored cores, black cores, mats made from linen or suede, and some really fancy ones! There are also fillets (which are small decorative wood strips that go in between the mats). Go have some fun!!
A word to the wise: If you choose against mats and are framing your photo, make sure to add spacers between the glass and the art. Know too, that 1/4″ of your art will be covered by the edge of the frame. Also, don’t use mats without glass in a frame.
FUN FACT:
Prior to the end of the 20th century, it was common for a well-to-do home to have ceilings that ranged from 9′ to 13′ high. There were 2 main reasons for this:
1). To keep rooms cool. Hot air rises, so the higher the ceiling, the cooler the floor level was. It also provided cleaner air, as the smoke from tobacco and candles also rises.
2). To show wealth. High ceilings meant a more luxurious room, with more space for furnishings, drapery, and ARTWORK.
What do this have to do with matting pictures?
Well, the higher the ceiling, the higher the artwork was that hung on the walls. And the higher you had to look up to enjoy the art, the more the bottom part of the matting surrounding the art seemed to shrink and visually look smaller than the matting at the top and sides of the art.
That’s when ‘weighting’, the bottom of the mat became popular. Framers would cut the bottom section of the mat wider (usually 1/2″ – 1″ depending on the size of the art and how high it was going to be hung).
Many framers still use this technique, but because we now know that it’s important to hang art at eye level, it’s really not necessary. However, it is still a good idea to ‘weight’ the bottom mat 1/4″ so that as gravity pulls the mat down into the rabbit of the frame, all 4 sides remain visually equal.
One other fun fact,
is that this optical illusion is primarily why Michelangelo’s statue of David has one giant hand. It was sculpted to sit on the dome at the top of the Santa Maria del Fiore Cathedral in Florence, Italy. Had David actually been placed on Brunelleschi’s famous dome – and had a normal sized hand – that hand would have looked pretty puny!
Now that you’ve gotten a little more familiar with matting your photos, let’s move to Step #3: GLAZING!
Glazing is a fancy framer’s word for Glass. There are numerous options when it comes to glass (including different grades of plexi-glass), but for this blog we’ll keep it to the 5 most commonly used types.
Before we get started, though, let me say a word about the damage that light – esp UV light – can do to art. Light is especially harmful to any type of art that is on paper. Damage shows as the art takes on a sepia or brownish-yellow cast. It can also fade ink, paint, and other art mediums. The thinner and more fragile the paper, the quicker and more severe the damage can be. Photo paper falls in the middle of the damage-risk scale. To help off-set this problem, glass companies have developed coatings that go on the side of the glass that faces the art, and can help prevent the damage. Personally, I think they are well worth the extra cost.
Please refer to the photo below as we discuss each type of glass:
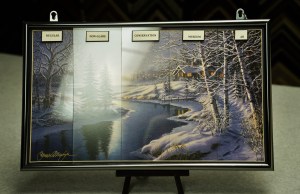
On the far left of the display photo, you’ll see a pane of Regular glass. Regular glass has the most reflection (as you can see, the lights on my ceiling are reflected onto the picture), and has no protection against light. It is the most commonly used form of glass, and is the most affordable.
The 2nd pane of glass on the display photo is Non-Glare. It has very little glare and is a good choice for inexpensive art that will hang in a room without many windows. It is made by acid-etching one side of the glass to diffuse reflection, but that etching can intensify the damage that light can do. As you can see, it also produces a milky, cloudy effect on your image. Because of this, you should avoid using Non-Glare glass if your photo has matting (especially more than one mat!). As the glass gets further away from the art with each mat, the blurrier it will make your photo look. It costs just a little more than Regular glass. (There is a Conservation Non-Glare glass available with the UV protectant coating as well, and it looks and performs the same as regular Non-Glare.)
The middle pane of glass on the display is called Conservation Clear glass. Conservation Clear has the same reflection issues as Regular glass, but the UV protectant coating will filter 99% of the sun’s harmful rays. This is my go-to glass for most art prints and originals. Conservation Clear glass is roughly double the cost of Regular glass.
The 4th pane of glass shows us the new Museum glass. Museum glass has the 99% UV protectant coating, but almost no reflection. Looking straight at it, your art can look as if there is no glass on it at all! It is fabulous glass, but it can be quite pricey.
The pane on the far right of the display is the new AR glass. I love this glass as it has almost the same anti-reflection quality as Museum glass, but at a much lower cost. On the down side, it’s coating only protects 68% of the sun’s damaging rays.
Obviously, there is much to consider when choosing your glass. You need to really evaluate the needs of your art, and what you are going to do with it. You also need to consider your pocketbook! A good framer will help you with your choices.
Your photo now has a backing, mats & glass. So now it’s on to our final Step #4: The Frame!
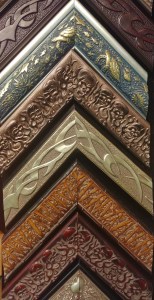
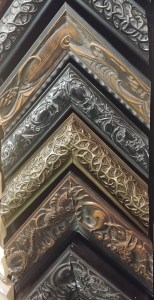
The final (and most fun!) step to framing is the actual Frame itself. I think of it as a moulding before it’s cut, and a frame after it’s cut. Moulding runs in price from around $2 per foot to well over $25 per foot, which is a HUGE difference in price! Do your framer a favor and never call asking, “How much would it cost to frame a 16×20 poster?”. Without choosing a frame, a price quote is impossible. Here are a few tips to remember when choosing a frame:
- Moulding generally comes in wood or metal. Both have great options. Moulding is charged by the foot.
- The most important thing to know first is, what you are trying to accomplish by framing your project. Is the framing (frame & mats) part of the art? In that case, choose a frame that really adds to the piece. For example, I recently framed a collage featuring drawings of muscle cars. We used a frame with the kind of flames you’d see on a car. Man was that cool! The framing was as much a part of the art as the art itself!
- Most of the time, though, you will want the framing to accentuate and spotlight your art. You’ll want to draw the viewer’s eye right to the heart of the composition, and have your work pop! In that case, the frame you select needs to do just that. If your eye moves out to your mats or frame, or distracts from your art in anyway, then it’s time to redesign.
- Do you have a favorite part of the photo? Choose a frame that leads your eye there. Is there a color that you really like? Choose a frame that pops that color. The frame should not fight with the mats. (I like to choose a secondary mat that coordinates with the frame in some way.)
- Know your budget. Keep in mind that when selecting a moulding, smaller doesn’t necessarily mean less expensive. Try and limit your choices to ones that are within your budget, and focus on the ones you picked first and trust your instincts. Quite often, the one that is right is the one that got your ‘knee-jerk’ reaction. Remember too, that if you are selling this piece, you’ll need to recap the cost of the framing when you sell.
- If you have a large piece, choose a moulding that is substantial. If your frame is too narrow, you will risk snapping the glass. Make sure your project is structurally sound.
- Know what kind of depth you’ll need. For instance, if you are creating a piece that needs room for memorabilia, or has multiple mats or fillets, make sure you choose a frame that is deep enough.
- Make sure that the width of the mats is not equal to the width of the frame, or it can look like stripy. Choose a frame that is either larger or smaller that the width of your mats.
With all the frame choices that there are, stand back from your samples and try and think ‘big picture’! Make sure, too, to get an educated opinion.
And don’t hesitate to contact me with any comments or questions! Contact me HERE
Leave A Comment